


View filters

Several Revit applications are running. Choose one:
Icon


Related news and articles
Using
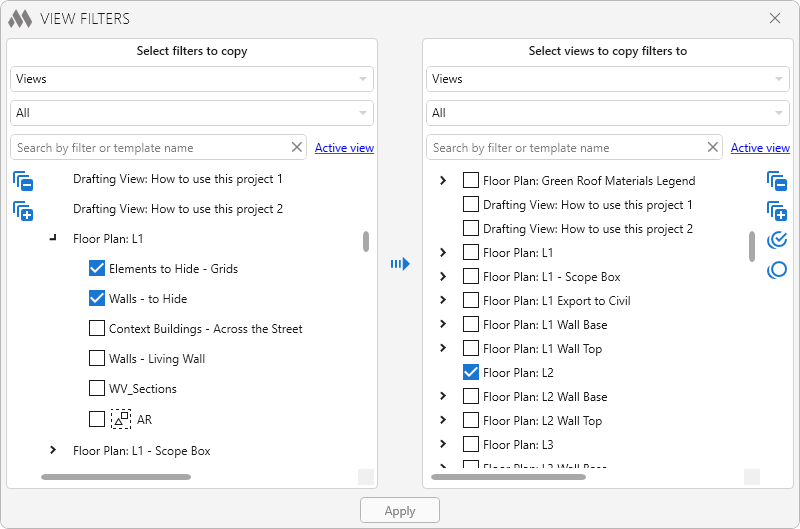
The plugin window is divided into two main areas:
The left area contains view templates or views, and filters for those templates or views, with the option to check (select) filters.
The right area also contains view templates or views, and filters, but with the ability to check (select) view templates or views.
Both zones contain filtering and searching elements:
- a drop-down list that changes the data source for filling the list - view templates or views.
- drop-down list with options for filtering by group of views, similar to Revit.
- text field for searching by filter or template name (type). To search for multiple values, you must specify them using semicolons without spaces.
The plugin window displays only views that have no template applied! And at the same time, only views that can have visibility filters!
In order to copy the filters, you need to find and select them in the left area. In the right area, you should check those view templates or views, to which you want to apply the selected filters.
For convenience of work with the lists, both areas have control buttons, which allow to collapse  and expand
 all elements of the list. In the left area, you can check all filters
 and uncheck all filters
 within the same view template or view. In the right area, these buttons check and uncheck all selections within the entire list of view templates or views.
To quickly find the current view in the view list, the Active View button is available in both areas:
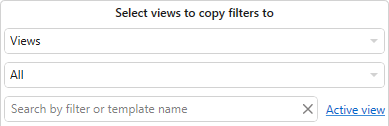
If the plugin is running on a sheet, the Active Sheet button becomes available. When clicked, the search bar will list the names of views placed on the current sheet through viewports.
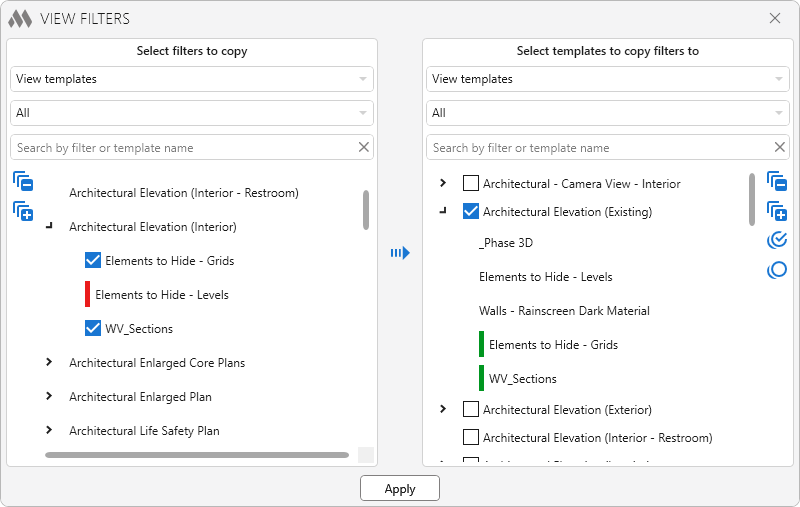
Use the  button to copy the filters checked in the left area to the view templates or views checked in the right area. The new filters will have the status of Created and will be marked with a green bar.
When hover the cursor over the filter, a delete button appears. If the filter existed in the view template or view at the time the plugin was launched, it will receive the Removable status and will be marked with a red stripe. In this case, instead of the delete button, a button will appear that allows you to clear the Removable status. If the filter has the Created status, then it will be removed from the list.
If you copy the same filter between different views, the graphics/visibility override settings are copied from the source view to the target view. The filter is marked with a blue bar:
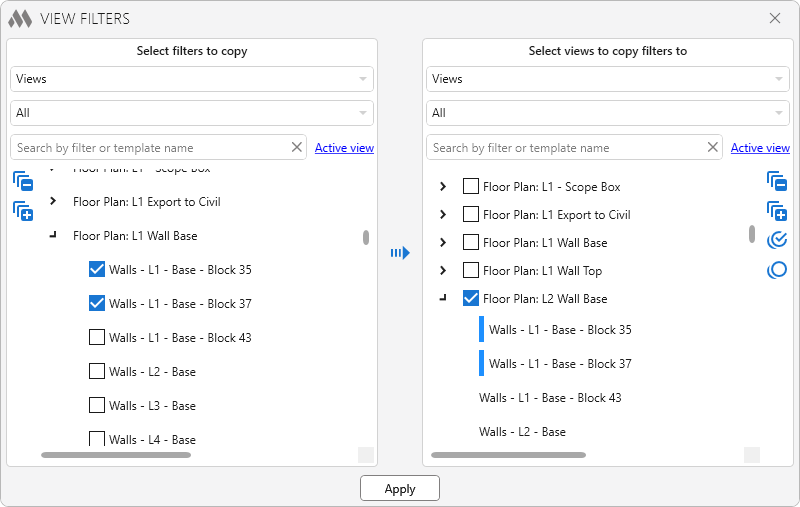
The order of filters determines their application priority. After copying, filters in the right zone can be moved within a single view or view template by holding the left mouse button. Additionally, filter order can be adjusted in existing templates and views—simply launch the plugin, make the necessary adjustments in the right zone, and click the Apply button.
The Apply button is used to set new filter statuses in the current document. After clicking it, filters with the Removable status will be removed from the view templates or views, and filters with the Created status will be added to the view templates or view. This will copy the graphics override settings for the created filters from the original view templates or views from which the filters were added.

 YouTube