


Split by height

Several Revit applications are running. Choose one:
| Name | Discount | Total value of individual orders | Total value of corporate orders |
|---|---|---|---|
| Regular user | 0% | ||
| 3% discount | 3% | $84 | $180 |
| 5% discount | 5% | $120 | $360 |
| 7% discount | 7% | $180 | $600 |
| 10% discount | 10% | $300 | $900 |
| 15% discount | 15% | $360 | $1 200 |
| Partners | 30% | ||
| BIM Consulting | 50% | ||
| Super VIP | 100% |
Icon


Related news and articles
Using
The plugin allows you to split walls and/or columns by height in one of the presented split methods. The split method is selected in the drop-down list at the top of the window:
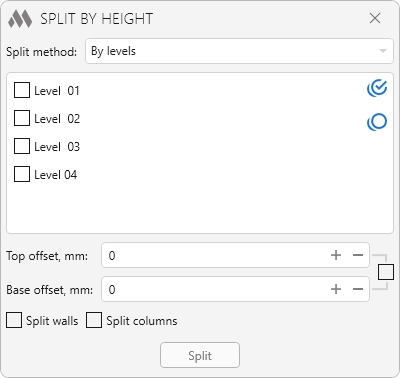
The middle part of the window contains the settings for the selected split method.
Below in the respective fields you can set a top offset (up) and/or a bottom offset (up) for the new walls and/or columns resulting from the split. To the right of these fields is a checkbox that allows identical offset values to preserve the dependency (described below). For the topmost wall, no offset is set from the top, and for the bottommost wall, no offset is set from the bottom after subdivision.
The Split walls and Split columns options specify which elements will be selected for processing.
When you click Split, you will be offered to select the elements to be processed – manual selection or selection of all elements in the view, after which the selected elements will be split according to the selected splitting method.
The plugin supports the following split methods:
By levels
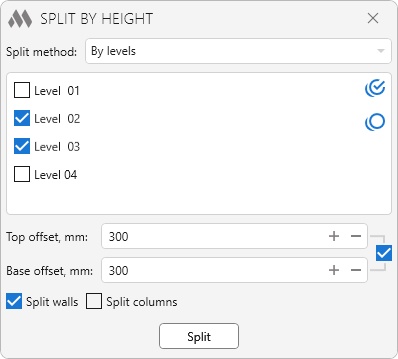
Splitting walls and/or columns by specified levels. The levels are selected from the list of available levels:
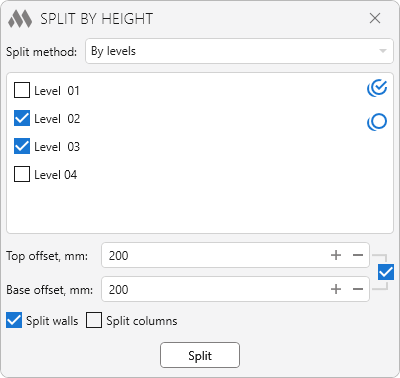
By reference planes
Splitting walls and/or columns by selected reference planes. To be able to use the split method it is necessary to select the reference planes by clicking the corresponding Pick button:
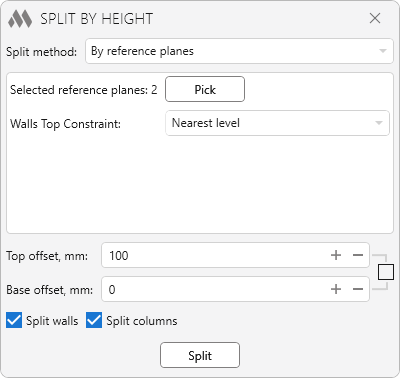
For this split method and for all subsequent split methods, you must also specify the top constraint for the walls:
- Nearest level – the wall top will be referenced to the nearest level;
- Nearest level from top – the wall top will be referenced to the nearest level above the wall. If no level is found above, the wall top will be referenced to the nearest level;
- Unconnected height – the wall top will not be referenced to the level.
The bottom of all new walls will be referenced to the nearest level.
Maximum height
Splitting walls and/or columns into an equal number of parts whose height will not exceed the specified value:
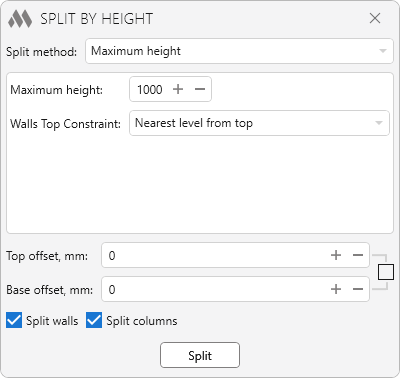
For example, if the maximum height is specified 2000 mm and the wall height is 5000 mm, the wall will be divided into 3 parts with a height of 1667 mm.
Exact height
Splitting walls and/or columns into parts of a specified height:
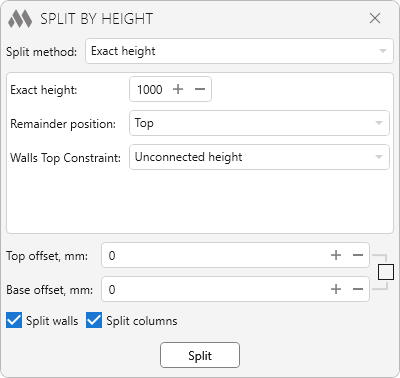
If the wall and/or column height does not divide by the specified value without a remainder, the remainder will be offset according to the selected option: to the top, to the middle or to the bottom.
Parts count
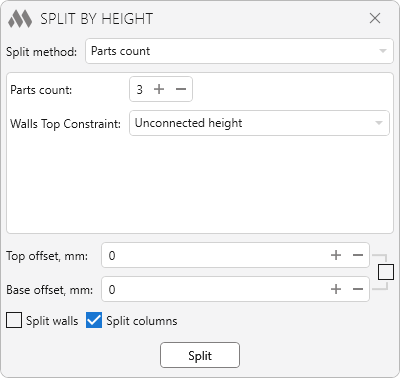
Splitting walls and/or columns into the specified number of parts:
By Floors or Beams
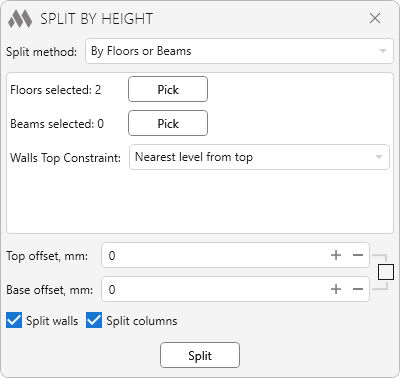
Splitting walls and/or columns by selected reference floors and/or beams. To be able to use the split method it is necessary to select the reference floors and/or beams by clicking the corresponding Pick button:
Notes
The plugin performs splitting of walls by copying the original wall and then changing the constraints. Walls with a cross section of variable thickness cannot be processed correctly!
Walls with a modified profile (profile defined by a sketch) are only processed correctly in Revit 2022 and higher!
Example of plugin operation with dependency preservation
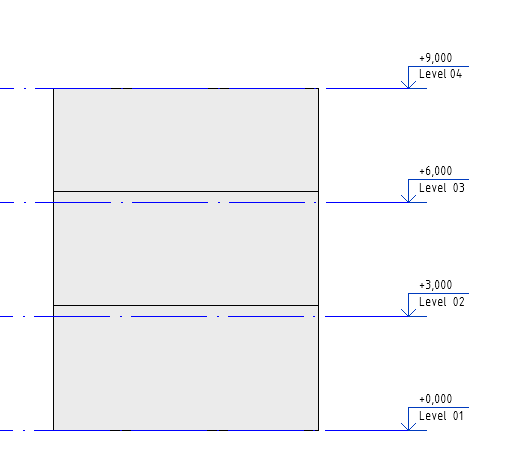
When dividing high walls into several parts with offset top and bottom of the new walls, it is recommended to specify the same value of offset top and offset bottom to avoid gaps or overlaps between the walls. Consider the following wall:
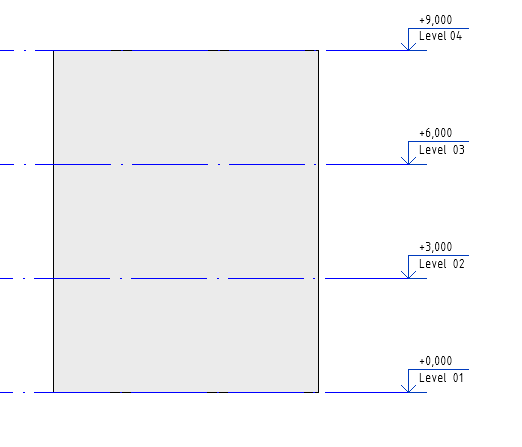
Divide it by Level 02 and Level 03 with an offset of 300 mm upwards:

 YouTube